We tend to take camshafts for granted, or at least I did until quite recently. Coaxing a little more power out of our Suzuki Katana meant that, like it or not, I had to get to grips with a little cam technology. But before we plunge too deeply into the strange world of ramps, overlap and durations, here's a quick trip around the trusty camshaft and its place in the world of internal combustion.
Any engine has to have some provision to get gas in and out of its cylinders. In a conventional four-stroke engine the job of the inlet valve is to open to allow fresh charge into each cylinder, then close to allow it to be compressed and ignited. After combustion, the exhaust valve opens to let the spent gasses out, then closes to allow the whole cycle to repeat.
Enjoy more Classic Motorcycle Mechanics Magazine reading every month.
Click here to subscribe & save.
The valves have to open and close at the correct time; should either one open too soon or close too late the gas can escape from the cylinder, affecting both power output and fuel consumption. Get it slightly wrong and the engine won't run, get it dramatically wrong and the valves will hit the piston crowns, or each other, and the whole plot goes pear-shaped.
The movement of the valves is controlled by the cams, effectively off-centre lobes mounted on a rotating shaft. The off-centre movement of the cams has to be translated into up-and-down motion on the valves, which leads us into the world of rockers and tappets.
 For now I'd like to stick to a simple model, so I'm going to imagine the engine has two camshafts, one for inlet and one for exhaust, both being mounted up in the cylinder head with the cam lobes operating more or less directly on the tops of the valve stems. Exactly, in fact, like a Z1, or GS1000, or any other of the myriad of dohc Japanese fours we know and love. As the camshaft is rotated, then, the cam pushes the valve open against spring pressure. As it rotates further the spring closes the valve again. As long as the rotation of the camshaft is timed correctly to correspond with the movement of the piston up and down its bore, the engine will run happily. So far, so good.
The engine designer has a few parameters to play around with here, so let’s go a bit deeper into cam design. Terminology time: lift is the amount the valve will be pushed off its seat, duration is the length of time it will be held open before it springs shut again. Fitting high lift cams to your engine will allow more gas to get in, using longer duration cams will mean it has more to time to get in there. Lift and duration tend to go hand-in-hand and generally speaking, performance cams will have a bit more of both. However, overdo it and the engine will lose the plot.
Gas travels rather like a wave, and there comes a point where incoming charge can rush into the cylinder, bounce off the gubbins inside and rush back out again before the inlet valve has closed. Not ideal. Duration and lift, therefore, need to be tailored to engine rpm, and the bottom line is that performance cams tend to provide more power in a particular rev range, at the expense of losing it somewhere else.
Exhaust cams
To complicate things further, the inlet and exhaust cams need to work together. Because of the speed at which gas travels, a certain overlap in valve timing is desirable. In other words, the inlet valve will open before the exhaust valve has finished closing. Get this right, and the incoming charge will push the exhaust gases out of the cylinder, the pressure caused by pushing being just enough to stop the fresh charge rushing headlong out past the exhaust valve with the old stuff. So now we have lift, duration and overlap sorted; there's just one more consideration left for the cam designer.
The opening and closing ramps on the cams will dictate how rapidly the valve lifts off its seat. Very high performance cams tend to have a 'squarish' look to the profiles, the result of very rapid opening and closing ramps. The limiting factor here has to do with the physics of shoving all that metal around at high rpm. Whacking the valves open too rapidly puts an enormous load on the cams and followers, and too steep a closing ramp means the valve springs simply can't keep up, leading to a condition known as ‘valve float’, where the valves fail to close fully onto their seats before being whacked open again. This is why conventional engines will need uprated valve springs to match high performance cams. Ducati’s well known but almost unpronounceable Desmodromic valve system was designed to address precisely this problem, with rocker arms that close the valves mechanically instead of relying on simple spring pressure.
 I'm assuming we will have very few readers who are going to be grinding their own cams, (my apologies if you are, but in that case you know all this stuff already). Most of us will be digging into the piggy bank and shelling out hard-earned cash to a specialist supplier, so the first thing to get right is to make sure they know what you want. You can have more power and more torque more or less anywhere you want it in the rev range, but not all at the same time. Overcooking the cam profiles can lose so much of the stock engines tractability that it actually becomes slower in real life terms. So, despite having a working knowledge of the physics involved, I found it so much safer when ordering our Kent Cams for the Katana to simply ask for something suitable for ‘fast road use’. Kent have the experience to offer something from the catalogue they know will work and, while they may be an option, full race cams will only make the bike faster under very specific conditions on the racetrack.
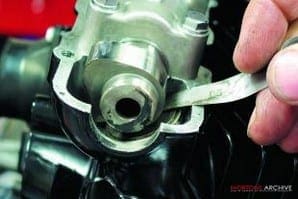
Fitting fast road cams should be a simple drop-in-and-ride-it operation, but anything more radical should be set up carefully with a degree disc and dial gauge to make certain the opening, closing and lift figures match the required specs. There is such a thing as engineering tolerance, and careful setting up will ensure the cams are working as they should. Specialist tuners may well extend the camwheel mounting slots to allow tiny adjustments to valve timing; paddock wisdom suggests all after-market cams should be checked (or ‘dialled in’) with a degree disc before assuming they're timed correctly. And don't forget to physically check mechanical clearances before starting up the engine; the valves must clear the tops of the piston crowns. Kent recommend inlet valves should have at least .050in clearance measured 10-degrees ATDC (After Top Dead Centre), and exhaust valves a minimum of .065in at 10-degrees BTDC. If the cams are timed correctly the valves shouldn't get tangled up with each other, but if you're using radical profiles with lots of duration make sure the valves can't touch. Finally, make sure the valve springs don't get coil bound at maximum lift; it's possible to have so much lift that the spring is fully compressed before the valve is fully open. If that happens something will break, and you can bet it won't be cheap or convenient when it does. Kent recommend a minimum of .040in clearance before the spring gets coil bound, and also recommend a similar clearance between the bottom of the top spring collar and the top of the valve guide at full lift. If in any doubt at all, check all the clearances yourself with the engine on the bench. We're a long away from manufacturer’s warranty territory here and if you get it wrong you'll be footing the bill.
Bike's performance
So what difference did the new cams make to our bike’s performance? I fitted the cams to the 1260cc GSX engine which had measured 120bhp on the Dyno at Motad, and noticed an immediate improvement in the bike’s ability to rev out. It felt like the torque curve had been transplanted higher up the rpm range, and from 6000rpm upwards acceleration felt noticeably improved. Rather scarily the exhaust headers turned dark blue as soon as the engine started, but it’s run happily with no signs of distress since. Conclusion? The stock cams are designed to provide a compromise – to do everything reasonably well. Fitting after-market cams will provide more power, more torque and (sometimes) even better fuel economy as long as you stick to mild, not wild, profiles. But be prepared to lose a little tractability and bottom end power. Worth it? We think so. ![]()
Thanks to Kent Performance Cams Ltd., www.kentcams.com