The BSA front forks were basically robust, reliable and obviously helped with the good handling characteristics that most lit SAs possessed. From experience gained in owning several different models personally and later with working on many in the line of our work at Bri-Tie, the A, B, and C model forks lasted well and needed little attention and wore very well indeed. Even to this day I am stripping forks that have never been overhauled, despite considerable mileages.
The BSA Company, designed and sold, under part numbers, special tools for overhauling the forks, but some of these are now unobtainable and some of the jobs can be undertaken without them. Then on the other hand, some companies, like MCA of Aston, Birmingham, have designed special tools too, like PL91 which I highly recommend and sell in the shop. This stanchion removing tool, which incidently also is your 'best friend' when replacing stanchions into the yokes, not only fits BSA forks but comes with several different adaptors to lit most British machines.
Enjoy more Classic Motorcycle Mechanics reading in the monthly magazine.
Click here to subscribe & save.
 Removing the fork seal holders from the sliding tube (bottom section) can often prove difficult, especially without the special tool 61-3005. However, one can be made with scaffolding tube as this is practically the same diameter. A strap wrench can also be used, indeed with some of the stainless steel seal holders we manufacture we have to use a strap because they have no slots for the special tool to save costs. Because of the good tolerances of the threaded section, the job can easily be done.
Fork seals are best removed and fitted with the special tools, but the job can be done with care using a socket. BSA also mention a top fork nut spanner, part no.61-3001 — obviously a nicely fitting spanner, but not an essential item.
Later type Bantam, A65 and Rocket 3 Mk1 forks have a different seal holder with two holes externally and these seal holders should be removed with tool no.61-6017. The seal holders still have slots in them, but half-round ones this time to accommodate the punch to punch out the old seals.
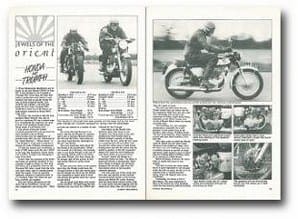
The alloy profile
Right up to date (well 1971) anyway, with the alloy profile (Cerriani type) forks for the 1971 BSA/Triumph range. Probably the worst forks, for wear, but the easiest to work on. Because of the open to all weathers stanchions and no gaiters, the chrome stanchions wore badly and also allowed dirt, salt etc to rip the seals to pieces, frequently dispensing oil all over the bike. One special tool here and probably the least expensive, 61-6113, damper valve removal and fitting tool — basically a long rod with a tongue on it.
Thankfully, practically all wearing parts are available for the BSA forks and with the A, B, and C models, most are interchangeable (also with Ariel!) Stanchions, bushes and seals are readily available at reasonable prices.
Stanchions around £38 per pair, to seals at approx £1 each. Fork seal holders are now plentiful, although a few years ago they were scarce. The chrome ones available are quite well made, but the chrome finish leaves much to be desired. We were the first on the market with stainless steel ones, because of this. Highly polished, they are indistinguishable from chrome and of course the more they are polished the brighter they become and they don't rust! Other companies have also made stainless. Ours at the moment are in short supply because of the high cost of the stainless bar needed to manufacture the threaded section. Later type seal holders are, however, not so plentiful.
 To remove the fork legs from the yokes, after removing the front wheel and mudguard, often proves difficult, because of the number of years they have been in situ; some people use broom handles inserted down the stanchion after removal of the top nuts; a tool can be made up using an old top nut, but the use of tool PL91 as mentioned previously does this job much better. Basically the tool is screwed into the top of the stanchion and given a couple of clouts, which releases the stanchion from the yokes. One must remember to loosen the yoke pinch bolts first. Ideally the oil should be drained beforehand.
Place the fork bottom in a vice and with tool 61-3005 remove the seal holder from the bottom leg. I find it helps to tap the threaded section gently all round first. Lift the seal holder up out of the way and by using small screwdrivers or a pointed tool prise the circlip out. Sometimes an easy job — other times quite frustrating, as those of you will know who have attempted it. The stanchion and bushes will then lift out of the fork bottom and any wear can easily be seen on both bushes and stanchions. Remove the nut from the bottom of the stanchion, as all the bushes and seal holder should be removed and refitted via the bottom of the stanchion. Because of the minimal costs involved it is advisable to fit new seals everytime. We will assume in this article that the stanchions are not bent at all, but rolling them will obviously show any irregularity. After fitting new bushes it may be necessary to fit a different shim size on the top of the top bush under the circlip to avoid any movement. When replacing the seals take care not to damage them, then screw the holder back onto the fork bottom — BSA used no.5 twine as a final seal at the base of the thread. Plastic gasket I have found does a good job here.
Back into yokes
All that remains is to fit the legs back into the yokes, once again using tool PL9I. This is where the tool really is a benefit. Once the stanchions are fully home, tighten the pinch bolts in the yokes, remove the tool and refill with oil.
Models CIO, C1OL, C11, CIIG, B31/33 (up to 1956), B32/34 Gold Star, A group up to 1952, M20/21, and M33 take ¼ pint in each leg. B models 1956 onwards, Gold Stars and A group 1952 onwards take 3/8 pint per leg.
Removal of the fork legs fitted to the A50/65 models of 1969/70 is exactly the same as the earlier models. However, there are differences once they are removed, like that of the seal holder which is removed by service tool 616017. Once the seal holder is removed, the stanchion will come out of the bottom along with bushes and the damper sleeve assembly. Once again, removing the bottom nut, this time with a C spanner or drift, will remove the bottom bush and damper shuttle. As well as a seal in the seal holder there is an 0 ring; replace if visible wear is detected. Reassemble in reverse of dismantling procedure. Refill with 190cc of SAE 20/40 or SAE 30 oil.
 On some 1971 models it may be necessary to remove the handlebars before the forks can be removed, to enable one to get at the top fork nuts! Once again the front wheel and mudguard has to be removed. On these model forks, unless the stanchions are bent or badly worn there is no need to remove the stanchions from the yokes. One item to be careful of is the speedo/rev counter assemblies, as these are held in position by the top fork nuts.
Once the top nuts have been removed and the springs removed, engage tool 61-6113 into the damper tube — keep the tool steady and then unscrew the Allen screw under the bottom of the slider. They will then be free to come away from the stanchions. The damper assemblies can now be removed by unscrewing them carefully. Examine each part and replace if necessary. Obviously if the stanchions are pitted or worn they can now be removed also. Once more we have the two seal system, an 0 ring and a conventional seal. We find the new American life long seals seem to last a lot longer than the original stock ones.
Reassemble, in reverse order to dismantling. Refill with Castrol TQF or equivalent oil.
I have only covered a straightforward fork overhaul in this article. If forks are suspected of being bent or yokes twisted, further special tools are necessary and here we recommend expert advice and help, unless one has all the workshop facilities at one's disposal. ![]()
Advert
 Enjoy more Classic Motorcycle Mechanics reading in the monthly magazine. Click here to subscribe.