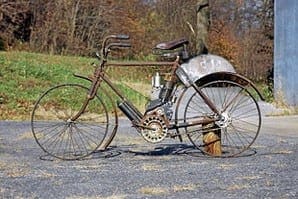
Bought a couple of years back to replace her tired CG125, the little Superdream had come with a history of problems and mishaps.
Despite being roadworthy and carrying a full MoT, the bike smoked like a two stroke and slurped copious quantities of oil during the brief time she’d ridden it before admitting defeat and opting for the luxury of a 3-series BMW for the daily commute.
Enjoy more Classic Motorcycle Mechanics reading in the monthly magazine.
Click here to subscribe & save.
We were unaware that the previous owner had had some engine work carried out, but a lubrication failure had damaged the new pistons he’d fitted.
The bike had subsequently been fitted with secondhand barrels and pistons which clearly weren’t up to the job.
As a top end strip was obviously required I decided to go the whole hog and take the engine out so we could tidy up the frame and running gear. And of course, having the engine out and on the bench I could hardly resist splitting the cases and taking a look inside. Turns out it’s a good job I did….
Full captions below, click on the gallery for step-by-step imagery and captions.
Picture one: With the tank, seat and panels removed I started by removing the regulator/rectifier and ignition coils from the frame. The coils can be left on their mounting plate but it’s worth making a note of the colour codes on the low tension leads.
Picture two: Next the clutch, rev counter and choke cables can be removed. The choke cable attaches to the left hand carb and is held in place with a single cross head screw, which might prove reluctant to move. A little gentle persuasion should free it off. This choke cable is quite badly frayed and will be replaced later.
Picture three: I unscrewed the carburettor tops and removed the throttle slides. The little Superdream has twin carbs and space is quite tight but a little gentle waggling should release the slides. Be careful not to bend the needles as the slides come out of the carb bodies. I left the slides attached to their cables, wrapped rags around them to avoid damage and taped them to the top of the frame out of harm's way.
Picture four: Once the carb bodies had been freed from their stubs and put aside I turned my attention to the engine’s electrics. All the connections for the ignition and alternator can simply be unplugged from the main harness. Everything is colour coded so it can’t get mixed up but if in doubt, make a sketch of the wiring connections first. The gear linkage, sprocket cover and chain can be removed at this stage.
Picture five: Now the engine top cover comes off to reveal the valve gear. This cover is usually retained by two shouldered bolts but these had been replaced by two studs screwed into the rocker housings – an acceptable repair when the threads have been stripped by ham-fisted previous owners.
Picture six: With the eight main cylinder head nuts removed, the two rocker housings can be lifted off complete with the rockers and put aside. Watch for the locating dowels; if one should drop into the camchain tunnel at this stage you’re committed to an engine strip to find it!
Picture seven: Next the camshaft comes out of the cylinder head. Start by releasing the camchain tensioner bolt and easing back the tensioner blade with a screwdriver before nipping up the locknut again. This will release tension on the chain and give some slack to remove the cam sprocket. Unfasten the sprocket bolts by holding the engine with a socket on the left hand end of the crankshaft. Remove both sprocket bolts.
Picture eight: There should then be just enough clearance to drop the sprocket off its mounting flange and unhook the camchain. Pull the camshaft clear, being careful to make sure the camchain doesn’t drop into the engine.
One of the cam bearings will slide off the end off the camshaft, keep an eye on that too. Finally loosely fit the cam sprocket back onto the camshaft and set it aside.
Picture nine: There isn’t room to lift the cylinder head clear with the engine bolted in place, so at this stage I opted to remove the front engine mounting.
The engine is now held in place with just two bolts at the rear of the crankcase; with the upper rear bolt removed the engine will pivot down until the starter motor rests on the frame downtube.
Picture ten: Release the two camchain tensioner bolts from the head and barrel, then ease it forwards out of the way. Three more bolts need to be removed before the cylinder head can finally be lifted clear. Collect any dowels and put the head assembly safely to one side.
Ensure all the hoses and cables have been disconnected from the engine; don’t forget the starter motor lead which runs right under the engine and up behind the crankcase.
Picture 11: To lift the engine out of the frame I had to remove the left hand footrest assembly to give me room to slide out the lower rear engine bolt. The engine can now be lifted up and sideways out of the frame. Removing the cylinder head first makes the unit light enough to lift easily onto the bench, while leaving both engine covers in place makes the engine easier to handle.
Picture 12: With the engine on the bench the stripdown continues by removing the barrels. These should now simply slide upwards off the cylinder studs. Make sure the camchain tensioner stud is pushed in, clear of the barrel, first and collect the pistons as they emerge from the bores to stop them clattering against the crankcase mouth.
Picture 13: Removing the pistons is an easy but slightly fiddly job. Ease out the outer circlips with a small screwdriver before sliding the gudgeon pins out and lifting the pistons clear. Make sure you don’t drop a circlip into the engine and throw the old circlips away to avoid any temptation to re-use them.
Picture 14: The generator cover can now be removed. I unbolted the starter motor first, then unhooked the starter drive chain and sprocket and put it aside. The steel adaptor plate fitted behind the generator rotor provides a mounting for the starter motor and betrays Honda’s late decision to add an electric starter to an engine obviously designed without one.
Picture 15: Pulling the generator rotor requires the use of a special tool. Lock the engine in place (a length of wooden dowel through the small ends will usually suffice) before removing the rotor centre bolt. Then wind the puller down until it meets the crankshaft and give it a smart tap with a rubber mallet to free the rotor from its taper.
The starter clutch assembly is bolted to the back of the rotor and will come away with it. If you don’t have the correct puller you can usually improvise using an old oil filter bolt or even one of the wheel spindles.
Picture 16: Buried deep in the crankcase, behind the rotor, Honda have hidden the neutral light switch. This is located with a small lockplate and bolt.
If you’ve any doubts about the neutral light working properly this is the ideal time to remove and test the switch. Otherwise it can be left in place.
Picture 17: Turning to the drive side of the engine, removing the clutch case reveals the clutch, primary drive, gear selector and oil pump.
The clutch lifter assembly is captive in the clutch case and you can split a stubborn gasket by removing all the cover screws then operating the clutch lifter. Pressure from the clutch springs will then push the casing off.
Picture 18: With the clutch case removed, be wary of losing a couple of smaller loose parts. This hollow pin is spring loaded into the end of the crankshaft and controls oil feed to the crank.
Collect it and store it safely. The clutch pushrod should also be set safely aside before it falls out and rolls into oblivion in the mess under the bench.
Picture 19: Next, the oil pump. It’s not strictly necessary to split the pump at this stage but I found it easier to remove the two outer screws and remove the pump drive gear to get better access to the three mounting screws that hold it on the crankcase. Note the small pin in the end of the crank that drives the oil feed pin.
Picture 20: The oil pump body is retained by these three countersunk screws, which should be quite tight. To avoid any risk of rounding the heads I always use an impact driver for this job. With the screws removed the oil pump can be set aside. I’ll take a close look at it later as I know the bike has had lubrication problems in the past.
Picture 21: Now the clutch. Removing the four bolts allows the pressure plate to be lifted clear, revealing the clutch springs and centre nut. With the oil pump removed you can also clearly see the primary drive and oil pump drive gears on the end of the crank.
Picture 22: Removing the clutch centre nut is a straightforward procedure on all engines except Hondas. Their unique design means another special tool has to be used and the clutch cannot be locked in place in a conventional way.
Some creative thinking may be required. I put the engine in gear, wrapped an old drive chain around the gearbox sprocket and clamped it up in the bench vice. Crude but effective. As I didn’t have the special tool to hand I made up a peg spanner from an old box spanner.
Picture 23: With the engine still locked in place I unbolted the crank nut. The clutch assembly, primary drive gear and oil pump drive gears can now all be lifted free and put aside. Collect any spacers and washers as they’ll all have to go back in the same order during the rebuild. With the clutch out of the way the gear selector shaft simply slides out of the crankcase.
Picture 24: Before splitting the cases make absolutely sure you’ve found and removed all the crankcase half screws. Some may be hidden under the accumulated crud beside the gearbox sprocket, and you’ll find them on both sides of the engine, sometimes buried deep in the clutch case.
With all the screws removed the left hand crankcase half should lift clear of the right, leaving the crankshaft and gear cluster in place. A light tap on the right hand end of the crank may be necessary to initially separate the cases and watch for spacers and washers from the gearbox shafts coming loose as the cases split.
Picture 25: The crankshaft runs on three main bearings, one in each crankcase half and one in the centre. The centre main bearing is carried in its own housing which is captive on the crank and bolted into the left crankcase half.
With all the retaining bolts removed the crank assembly can be pulled free from the crankcase, bringing the camchain and tensioner assembly with it.
Again, a light tap on the crank end may be necessary to drive the crank out of the left hand main bearing.
Use a rubber or copper mallet to avoid damaging the crankshaft end.
Advert
 Enjoy more Classic Motorcycle Mechanics reading in the monthly magazine. Click here to subscribe.